How to Do Test Driven Development in C# .NET 5 and VS Code
Introduction
In this article, we will do a coding exercise in C# .NET and Visual Studio Code. But this is not an ordinary coding exercise because we will do it using a technique called Test Driven Development or TDD.
We will also learn how to setup NUnit Test framework in VS Code. Using .NET 5, the current version of the free, cross-platform, open-source developer platform for building many different types of applications.
We will be coding a very simple code kata called FizzBuzz. The point of this article is not show the best implementation of FizzBuzz but to implement it in a Test Driven way. So that we can change the implementation any way we want without the fear of changing our code.
Coding the tests first encourages a more safe and fun learning because we are free to implement our code however we want. The resulting unit tests ensures that we are safeguarded from messing up the code. It’s like a safety harness that’s why the collection of unit tests (a test suite) are oftentimes called “Test Harness”.
Make sure to check out the accompanying video as well.
Requirements
Visual Studio Code
.NET 5
Basic knowledge of the C# programming language
Setting up the Development Environment
Make sure to install Visual Studio Code and the .NET 5 SDK. To check if you have the .NET 5 CLI installed, run the following command in your terminal or command line:
dotnet --versionIf you have installed .NET 5 SDK correctly, you should get 5.0.103 or above. Create a directory where the place the projects. Adjust according to your command line interface. Below is for Bash.
mkdir FizzBuzzGo into the created directory and create the C# Console Project (our System Under Test or SUT)
cd FizzBuzz
dotnet new console -o FizzBuzz
Create the NUnit Test Project (our Unit Test Assembly)
dotnet new nunit -o FizzBuzz.TestsGo to the Test Project directory and add reference to the Console Project.
cd FizzBuzz.Tests
dotnet add reference ../FizzBuzz/FizzBuzz.csproj
While inside the test project directory, run the following to make sure everything is good so far.
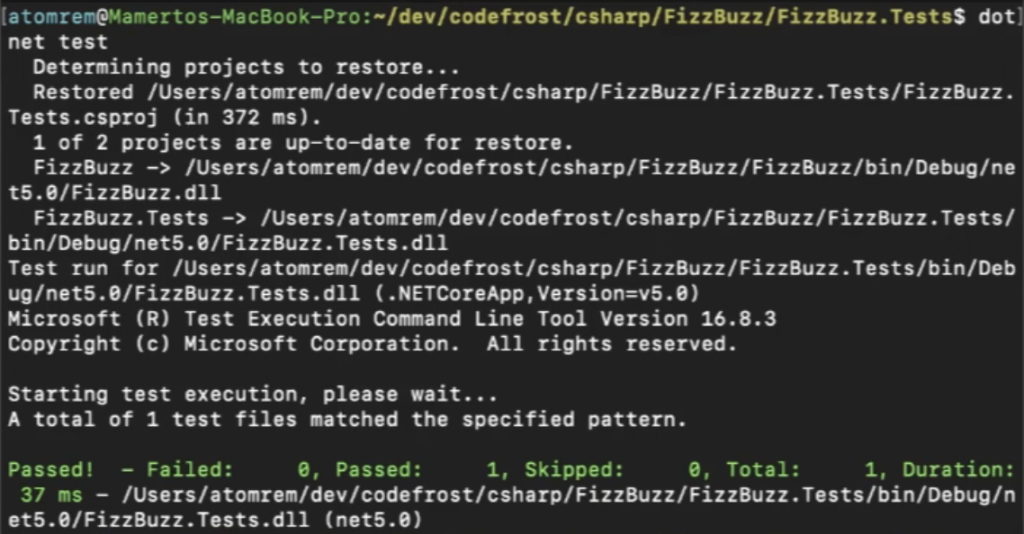
dotnet testWhen .NET CLI created the Test Project, it also created a sample unit test method. So you should see one passing test.
Now it’s time to open the projects in Visual Studio Code. You can either run VS Code and browser the main directory we’ve created above or go up one directory and use the following command:
code .The Instructions for FizzBuzz
This is the typical instruction for the FizzBuzz coding exercise.
Write a program that prints the numbers from 1 to 100. But for multiples of 3 print “Fizz” instead of the number and for the multiples of 5 print “Buzz”. For numbers which are multiples of both 3 and 5 print “FizzBuzz”.
Test Driven Development – An Overview
In Test Driven Development (TDD), instead of writing code right away or even writing the code based on a UML diagram or some pseudocode, we write a failing unit tests first. At first, the unit test needed to be written is very simple and primitive but this is an important step in TDD. It could be as simple as a non-compiling or building code at first. This step or phase is called RED state in TDD cycle.
The next step is to then write a very simple code to make that test pass. This is the GREEN state in TDD cycle. Since we now have a passing test, or building code, we can do some refactoring just enough to structure the code properly as needed by the current tests and code. This is called the REFACTOR state in the TDD cycle.
After completing the first TDD cycle, we then go back to writing the next failing unit test (RED), write just enough code yo make it pass (GREEN), and improve the code structure without changing the functionality (REFACTOR). This cycle will continue to be repeated until the code satisfies the requirements. Refactoring can continue even further as needed in order to support optimizations, enhancements, and extensibility.
So now we will start coding FizzBuzz following the RED–GREEN–REFACTOR TDD cycle.
Our First Failing Test (non-compiling)
If you’re new to TDD, it would seem weird to write a failing test. But almost everything that involves some form of creation involves a failing test. We try something first to see if it would work. That something is a well-thought of metric or criteria that would be considered success if proven by our actions. Until we do the “action”, that “something” is failing because it is not yet proven. If we think of it this way, TDD will become more natural.
Moving along, we analyze the requirements of the FizzBuzz code kata. It says that we need to print the numbers from 1 to 100 so we need some kind of generator that would list a series of numbers. Open the UnitTest1.cs under the FizzBuzz.Tests directory and make the Test1 method look something like this:
[Test]
public void Test1() {
  var generator = new Generator();
  var results = generator.Generate();
}
Obviously since we don’t have a Generator class yet, this would not even compile. Hence, a failing test.
Generating the Generator class
To make the above code compile and build, we need to write the Generator class and the Generate method. We could either type it in manually right inside the UnitTest1.cs file as an internal class or use VS Code to generate it for us. In any case, the resulting code should look like this:
public class Generator
{
  public Generator()
  {
  }

  public object Generate() {
    return null;
  }
}
But it does nothing! You might scream. Yes, that’s intentional. Remember, our objective at this time is to write enough code to make the C# compiler happy (a passing test). At this point, there’s really nothing to refactor yet, so we can skip the Refactor step for now. Now let’s go back to generating a list of numbers.
Writing a Real Failing Test
With the Generator class and Generate method in place, we can now write a real failing unit test. Let’s add an Assert statement to the Test1 method to test if the count of items generated by the Generate method has a count of 100.
[Test]
public void Test1() {
  var generator = new Generator();
  var results = generator.Generate();

  Assert.AreEqual(100, results.Count);
}
Now run dotnet test and we will see that this will fail because our Generate method is just returning null right now.
Making Our Test Pass
To make this pass, we can go back to the Generate method and write a for loop adding each item to a list like so:
// Make sure to add using System.Collections.Generic above
// Code truncated for brevity

public IList<int> Generate() {
  var results = new List<int>();
  for (int i = 0; i < 100; i++) {
    results.Add(i + 1);
  }

  return results;
}
Now run dotnet test again and feel that awesome feeling of seeing a green, passing test. Surely it will make you smile.
For the refactoring step, perhaps we could rename the variable results to a more meaningful and descriptive name like items. We could also rename our Test1 method to something smart like Should_Generate_100_Items.
[Test]
public void Should_Generate_100_Items() {
var generator = new Generator();
var results = generator.Generate();
Assert.AreEqual(100, results.Count);
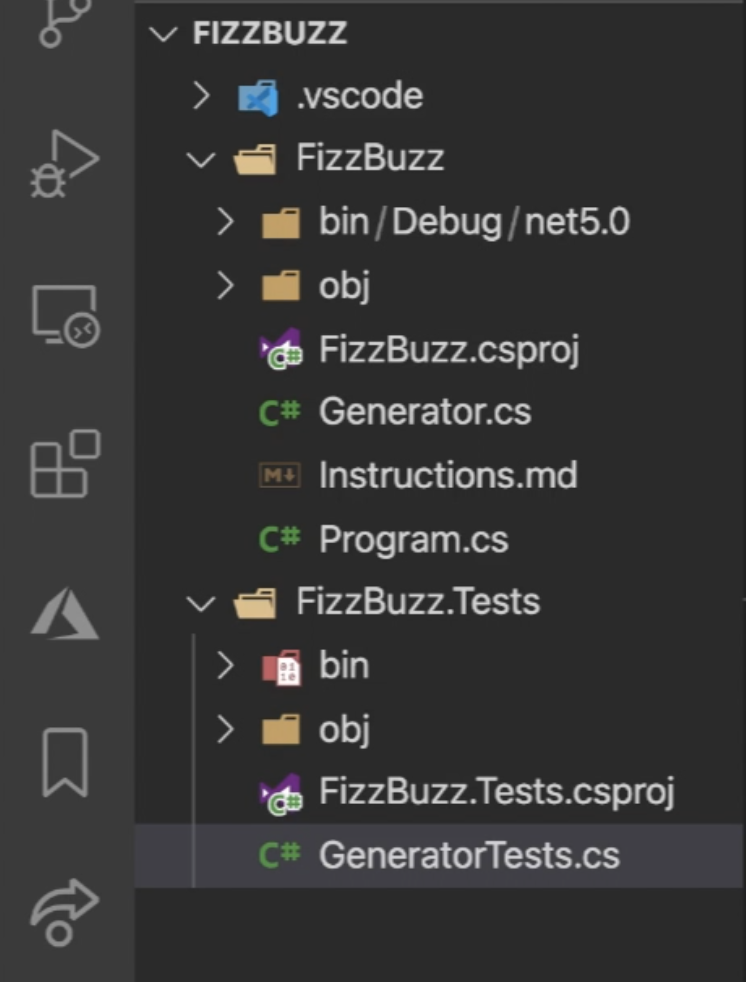
}As part of the refactoring process, we could also rename our UnitTest1.cs file and Tests class to something more appropriate like GenerateTests. We can also move the Generator class to its own file and to the FizzBuzz project directory. Use VS Code to do these refactoring for you. The result should be something like this:
Make sure to run dotnet test again afterwards to see if you broke something.
Did you feel that warm blanket around you as you make these simple changes knowing that your unit test even as simple have your back? That’s the power of TDD.
At this point, you might feel that the joy you’re feeling is being robbed by the repetitive typing of dotnet test each time you want to test your code. Let’s get back your happy feeling by running:
dotnet watch test --nologoThis command will watch for our file changes and run the test automatically each time we save the changes. The --nologo option is there to remove the Microsoft and test banner and keep the test output clean.
Now we go back to the instructions and see what test do we need to write next.
“Fizz” is Not a Number
We found out that we need a list of string and not a list of numbers (int). Before changing the return type of the Generate method, why don’t we create a new test for that for the sake of practice?
[Test]
public void Should_Return_String() {
  var generator = new Generator();
  var results = generator.Generate();

  Assert.AreEqual("1", results[0]);
}
In this test, we expect to get a string number "1" as the first item on the list (index 0). This test will fail and that’s a good thing because we will make it pass soon. We can do that by changing the return type of our Generate method from IList<int> to IList<string> like so:
public IList<string> Generate() {
  var results = new List<string>();
  for (int i = 0; i < 100; i++) {
    results.Add((i + 1).ToString());
  }

  return results;
}
This should make that failing test pass. Another achievement! Now you wonder why other tutorials don’t make you feel this way.
Of course, we’re not done yet. Let’s see how we can get “Fizz” for numbers that are multiples of 3.
The Simplest Code
Let’s create the next test. What is the simplest test we could write that will tell us if a number that is a multiple of 3 will return “Fizz”? Well, we can test if the first multiple of 3, which is the number 3 itself will return “Fizz” instead.
[Test]
public void Third_Item_Should_Be_Fizz() {
  var generator = new Generator();
  var results = generator.Generate();

  Assert.AreEqual("Fizz", results[2]);
}
This test will surely fail. Yes! That means our unit tests works doesn’t it? Now, how do we make it pass? Remember, we only need to write enough code to make the test pass. So what’s the simplest code we could write to make this test pass?
public IList<string> Generate() {
  var results = new List<string>();
  for (int i = 0; i < 100; i++) {
    if (i + 1 == 3) {
      items.Add("Fizz");
    } else {
      results.Add((i + 1).ToString());
    }
  }

  return results;
}
You will that the code above will make the currently failing test (along with the old ones) pass. Okay moving along… “Hey! That’s cheating!” I heard you saying. That’s correct because that’s the simplest code we could write right? You might be surprised that as a young developer, I also tend to do this kind of coding myself just to make my code works. And believe me that I’m not alone. Because we don’t have unit tests. “As long as it works” is my favorite quote for a long time.
But of course, that solution will not work for long. How about the next multiples of 3 like 6, 9, 12 and so on? We can make the same hard coded solution but can imagine how horrible our code would look like? I don’t even have the guts to show it here for you. Instead, let’s write a failing test for that.
[Test]
public void Sixth_Item_Should_Be_Fizz() {
  var generator = new Generator();
  var results = generator.Generate();

  Assert.AreEqual("Fizz", results[5]);
}
So now we will do this properly. We will need to use what our teacher thought us in Mathematics that we thought we will never use in real life anyway. Now we realized how much we missed our class. Those theoretical lessons are there for a reason. Don’t skip them kids! Enter the modulo operator.
The Modulo Operator
In order to determine if a number is a multiple of “something”, that number must be equally divisible by that “something”. Now let’s try that one more time in a different format that will make us appear smart.
In order to determine if x is a multiple of y, x must be equally divisible by y. Now let’s wake up to the real world.
In other words, if a number when divided by other number and has no remainder, then that number is a multiple of that other number. In C# we have an operator to do that and that is the modulo operator %. We can implement our code like this:
public IList<string> Generate() {
  var results = new List<string>();
  for (int i = 0; i < 100; i++) {
    if ((i + 1) % 3 == 0) {
      items.Add("Fizz");
    } else {
      results.Add((i + 1).ToString());
    }
  }

  return results;
}
Be sure to wrap the i + 1 inside () before applying the % operator because the % operator has the same precedence as multiplication and division (remember MDAS?). Otherwise, i + 1 % 3 will be evaluated as 1 % 3 then + 1 which would give an incorrect result.
We should now have another passing test! What a great feeling. Now let’s refactor. Have you noticed that we have duplicate code in our tests as well? That’s right, we keep on writing that generator and results line on each of our tests. We need to treat our test code like or production code (our SUT) so we need to make our test code clean. Let’s utilize the Setup() method of NUnit for this. We can then remove the duplicate code on each test methods.
public class GeneratorTests
  {
    private IList<string> results;

    [SetUp]
    public void Setup()
    {
      var generator = new Generator();
      results = generator.Generate();
    }

    [Test]
    public void Should_Generate_100_Items()
    {
      Assert.AreEqual(100, results.Count);
    }
...
“Buzz”
A number that is a multiple of 5 should print “Buzz”. That should be easy at this point but we need a failing test first. Don’t skip this part. This is our parachute, our safety harness. And we do it first so we don’t forget to write it. You will not forget to bring your parachute when boarding a private airplane reasoning that other people have landed safely before right?
[Test]
public void Fifth_Item_Should_Be_Buzz() {
    Assert.AreEqual("Buzz", results[4]);
}
Making this pass should be familiar. We just need to add another condition like so:
public IList<string> Generate() {
  var results = new List<string>();
  for (int i = 0; i < 100; i++) {
    if ((i + 1) % 3 == 0) {
      items.Add("Fizz");
    } else if ((i + 1 % 5 == 0) {
      items.Add("Buzz");
    } else {
      results.Add((i + 1).ToString());
    }
  }

  return results;
}
“FizzBuzz”!
At this point, you should be more familiar with TDD and is gaining more confidence in your code. Don’t be afraid to refactor after each passing test. I skipped it here to avoid a very long article that it already is.
Let’s continue with the next failing test. A number that is both a multiple of 3 and 5 should print “FizzBuzz”. Here is the test for that. We use 15 here because it’s the first multiple of both 3 and 5.
[Test]
public void Fifteenth_Item_Should_Be_FizzBuzz() {
    Assert.AreEqual("FizzBuzz", results[14]);
}
How would you make this pass? Take this opportunity to write your solution.
Have you come up with the following? That’s right! It’s important to add this new condition above “Fizz” and “Buzz”.
public IList<string> Generate() {
  var results = new List<string>();
  for (int i = 0; i < 100; i++) {
    if ((i + 1) % 3 == 0 && (i + 1) % 5 == 0) {
      items.Add("FizzBuzz");
    } else if ((i + 1) % 3 == 0) {
      items.Add("Fizz");
    } else if ((i + 1 % 5 == 0) {
      items.Add("Buzz");
    } else {
      results.Add((i + 1).ToString());
    }
  }

  return results;
}
That should pass. We are almost done here. But let’s refactor our code to make it more readable, and extensible. There are a few duplicate code currently. We can also remove the optional curly braces. Again, take this opportunity to do the refactorings yourself. The result should be something similar to below:
public IList<string> Generate()
{
  var items = new List<string>();
  for (int i = 0; i < 100; i++)
  {
    var item = (i + 1);

    if (IsMultipleOf3(item) && IsMultipleOf5(item))
      items.Add("FizzBuzz");
    else if (IsMultipleOf3(item))
      items.Add("Fizz");
    else if (IsMultipleOf5(item))
      items.Add("Buzz");
    else
      items.Add(item.ToString());
  }

  return items;
}

private static bool IsMultipleOf5(int item)
{
  return item % 5 == 0;
}

private static bool IsMultipleOf3(int item)
{
  return item % 3 == 0;
}
Yours could be different and that is perfectly okay. Now that we have a comprehensive suite of tests, we have the courage to change our code. We don’t have that feeling where if we touch anything, we fear that our code will not work somehow. No more of that!
Our final task is to integrate the Generator class to the Console program. That should be very simple to do.
namespace FizzBuzz
{
class Program
{
static void Main(string[] args)
{
var generator = new Generator();
var results = generator.Generate();
foreach (var item in results)
{
System.Console.WriteLine(item);
}
}
}
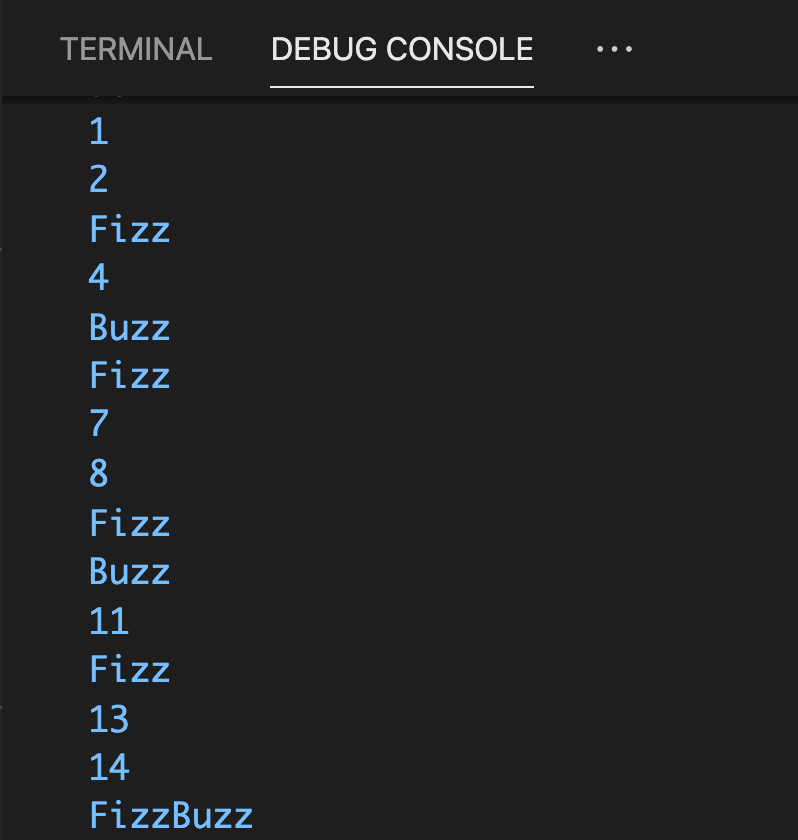
}Running the console program will result to the following. Notice that this is the only time we actually ever run the program to see if it works. Without TDD, we would have to run this program every time we want to check something. No more of that!
Conclusion
In this article, we implemented a coding kata called FizzBuzz in C# .NET 5 via Test Driven Development in Visual Studio Code. This is very useful in coding interviews because if your interviewer values the power of TDD, it will be an advantage for you.
Although lengthy, this article also helps us to have a basic structure that we could use on larger systems. The code we’ve written can work on different form of output, such as HTML or saving in a text file.
The biggest take away is that we learned a way to code with confidence in each step. On each failing test, we exercise our thinking and analysis ability. On each passing test, we feel that we achieve something, moving us to do more, giving us courage to improve our code and try new things. All without the fear of breaking our code. What a powerful way to code.
You can restart this exercise on your own. Try different implementations. Try using an array instead of a list, for example. Only then you will be comfortable in this style of development.
Later on, we will do something similar but using a different language. Demonstrating that we can learn a new language with the help of Test Driven Development. See you then!
Here is the GitHub repo for this exercise: https://github.com/mamertofabian/FizzBuzz_csharp
PS
Skills such as Test Driven Development is not widely taught at schools along with other skills you really need. Download my FREE Software Developer Compact Career Guide to help you jumpstart your Software Development career and have more opportunity to learn much needed skills such as TDD.
I can recommend: Pragmatic Test-Driven Development in C# and .NET: Write loosely coupled, documented, and high-quality code with DDD using familiar tools and libraries https://amzn.eu/d/3SdAmG7